While WordPress makes it easy to create a blog or website for everyone for free, it’s not always that easy and often webmasters end up making several mistakes
WordPress is one of the most trusted platforms for creating a website. Many people prefer this CMS when it comes to creating different types of websites, whether it's a blog, Q&A website, portfolio website, or an e-commerce website. WordPress offers good features for building and customizing websites, making it an easy-to-use option.
While WordPress makes it easy to create a blog or website for everyone for free, it’s not always that easy and often webmasters end up making several mistakes. Due to these WordPress website mistakes, you can fail to get the desired results with your site. Even savvy WordPress users, who have been using it for years can make mistakes.
“Access
The following Quick Win is for everyone wanting to boost their online presence and improve results from their content marketing strategy.
Access the
Whether you hire a WordPress developer to build your site or create a site yourself, there are some big WordPress mistakes you need to avoid to get the best out of your site. Let’s take a look at the big mistakes that most webmasters make and how to fix them.
Not changing the database prefix
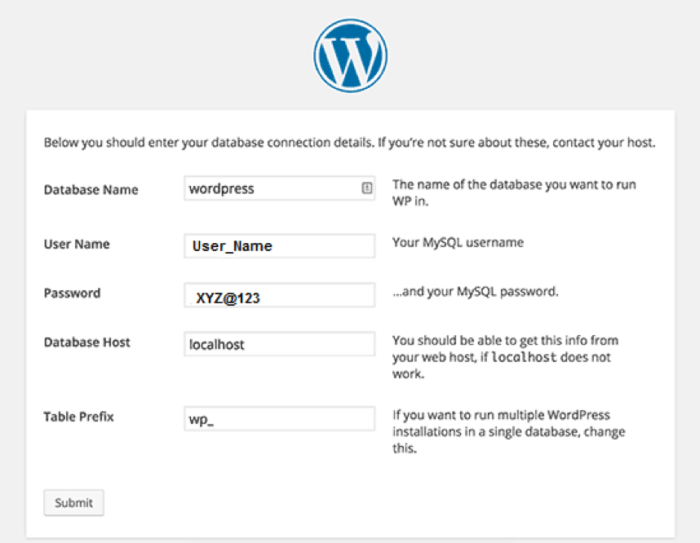
Being a popular content management system software, WordPress is the prime target for many spammers and hackers. The database of your site is very important as it comprises your site’s data like posts, theme and plugin settings, options and more. By default, when you install WordPress, the table names in the database are prefixed with ‘wp_’, which means you have table names like ‘wp_users’, ‘wp_posts’, ‘wp_links’, ‘wp_comments’ etc.
The prefix is a default name, which everyone knows and this puts your database at risk. For example, automated scripts target WordPress databases using these default table names. It makes it easier for hackers to attack a database. You can protect your database by changing the prefix, follow below steps.
Note: You should always make a complete backup of your site before making any database changes.
- Login to cPanel then go to file manager.
- Click File Manager to enter the WordPress directory.
- Now click on public_html then find wp-config.php right click it and choose Edit from the options. You will see a pop-up window again click Edit.
- Search for line:
$table_prefix = ‘wp_’;
- Change the ‘wp_’ prefix with your own choice.
- Now click phpMyAdmin from your cPanel.
- Click SQL.
- Now write command for all tables like:
RENAME table`wp_comments`TO`test_comments`;
- Once you execute the queries for all tables their prefix will be changed.
You should also change the prefix for tables created by third-party plugins.
Customizing parent theme instead of the child theme
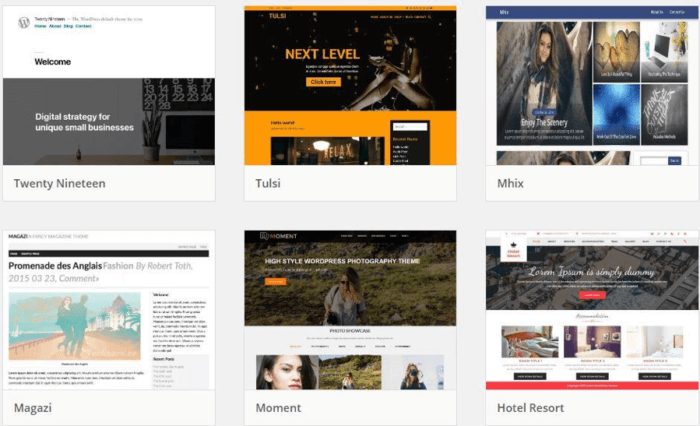
You have found the right theme for your website and after some customization, you integrate it into your site. But when you update your theme, all the customization you make are lost. Therefore, you should use a child theme instead and customize it to ensure that your customization isn’t lost after an update.
A child theme is put in a separate folder than its parent theme. Plus, it also includes its own ‘style.css’ and ‘functions.php’ files. You can modify layout and styling parameters, coding and scripts and other aspects of the theme using the relevant .php and .css files. After using a child theme when someone visits your site, the child theme is loaded first then the missing functions and styles are loaded from the parent theme.
Not turning off debug mode
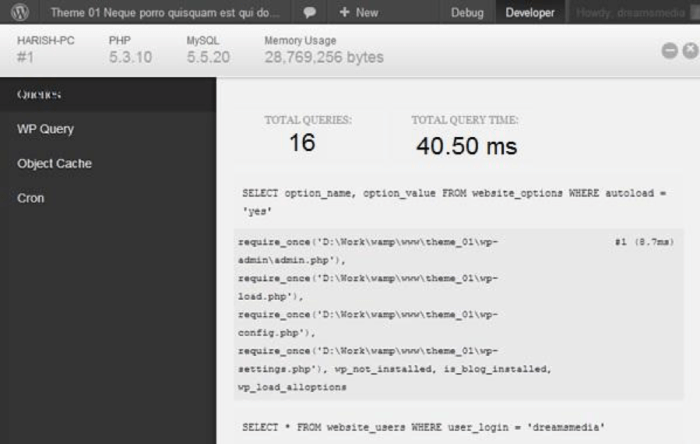
Debug mode allows a developer to examine PHP warnings, errors and notices, which are raised when something goes wrong. They are very useful for debugging PHP code. While it is quite beneficial for a developer for debugging purposes, it shouldn’t be visible publicly as it may reveal scripts and private paths that should be hidden from the public. You can turn the debugging off by editing the wp-config.php file.
First, you need to open the wp-config.php file then look for the line:
define(‘WP_DEBUG’, true);
Set the following lines of code instead of the above code:
ini_set('display_errors','Off');
ini_set('error_reporting', E_ALL );
define('WP_DEBUG', false);
define('WP_DEBUG_DISPLAY', false);
After this, save the changes and upload the file on the server. You should now check that no errors, notices or warnings will appear on your site. This is an essential step to ensure that your site is secure and looks more professional.
Blocked search engine indexing
If your website isn’t indexed on search engines it won’t show up in the search results, which means it won’t be visible online. Essentially, your site won't exist on the internet. Therefore, when you install WordPress, by default the site is allowed to be indexed on search engines.
However, often developers disable the feature to stop half-finished pages from being displayed in the search engine results pages. But, if this feature is still disabled after the work is over, the problem will arise. If you find that your website pages are not appearing on Google despite good SEO practices then check whether search engine indexing is disabled on your site.
Not turning off directory browsing
Directory browsing enables a person to browse the folder and its content that is present in your website root directory. If you don’t disable directory browsing, it can be used by a hacker to find vulnerabilities in your website and server. This will put your website at risk. In order to ensure the safety of your website, you must make sure to disable directory browsing.
Below is the process to disable directory browsing:
You can disable directory browsing with a single line of code. For this first go to the .htaccess file located in the root directory of your site using FTP client or any other browsing tool. If you don’t find the file then ensure that your FTP client is set to show hidden files. Download and edit this file using any editor like Notepad. At the bottom of the file simply add:
Options -Indexes
Then save the .htaccess file and upload on the server. That’s it!
Not using CDN
Performance is the most important factor in today’s web browsing environment. No one likes a website that takes too much time to load and often first-time WordPress users complain about their website speed.
One of the best ways to improve the speed of your site is by using content delivery network (CDN). The speed of a website has a direct impact on the user experience CDN speeds up the delivery of content to your users, which enhances the overall user experience. Adding CDN to your website can make it a lot faster, reducing the risk of users bouncing. This is great method to boost the speed of your website, which is loaded quickly in any part of the world.
Under this, the static part of your site is stored on a network of servers, which is globally distributed. With this, a visitor can access your website very quickly from any part of the world. It reduces page load time to a significant extent.
Not changing the default favicon
Favicon short for favourite icon is a small icon that appears on the left of website title in a browser. It is also displayed in the address bar in some browsers and in bookmarks next to a site’s name. Favicon is like an identity card for your business, which should show your brand. It adds an additional branding element, which allows the users to recognize your website. If you ignore favicon a default icon is displayed provided by WordPress, web hosting, or the theme you use.
If you are wondering how to add the favicon for your WordPress site, then below are some simple steps to do this:
With the release of WordPress 4.3, now users don’t need to create a favicon explicitly, they can use WordPress customize options to create and add favicons.
Requirements: You can use popular image files like jpg, png, gif etc. Four different sizes of images are needed to display the icon on different platforms. But with WordPress, you only need an image at least 512x512 px and the four sizes are created by WP customizer.
- From your WordPress dashboard go to Appearance > Customize.
- From Customize screen, choose Side Identity where you will get Set Icon option.
- Choose Set Icon and choose an image from the media library or upload a new one.
- You will be needed to crop the image after this WordPress will generate the required image sizes need for different platforms as follows.
Browser favicon: 32x32px
iOS app icon: 180x180px
Android/Chrome app icon: 192x192px
For Windows desktop: 270x270px (medium-sized tiles)
Ignore WordPress updates
Many beginners and even experienced WordPress users do not install updates when they are available for the platform. Many users think that the update may cause errors or break their website. But, that is a misconception and you can update your website safely without any difficulty or breaking your site.
In fact, if you don’t update the site, you leave it vulnerable to security breaches due to outdated software. Besides WordPress, you may also get updates for your website themes and plugins, which come with improvements, bug fixes, new features and security patches.
Not setting permalink
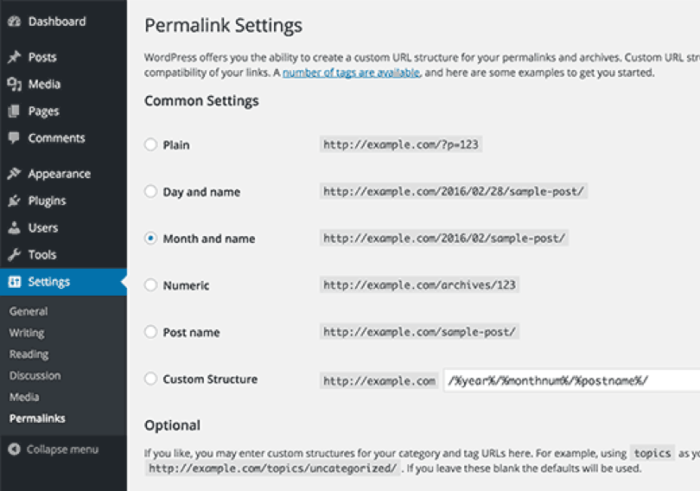
It is very important to choose the right URL structure or permalink, which is the permanent link of various pages on your site. It is important from both the user and SEO perspective. By default, WordPress shows a plain URL, which looks something like “https://www.your-site.com/?p=102”. As you can see this type of URL is not user-friendly which doesn’t reveal much about the page.
Choose a URL like “https://www.your-site.com/category/post-name”
or
“https://www.your-site.com/01/08/2019/post-name”
or
“https://your-site.com/post-name”
The last one is the best option and is widely used by websites. It provides a hint about the page and is also SEO-friendly. To change the URL structure, simply go to Settings >> Permalinks from your site’s admin panel.
Wrapping up!
WordPress is an easy platform for non-technical users, and it is cost-effective as you can do a lot of thing without needing to pay a single penny. While most of the functionalities of WordPress are easy to deal with, often beginners make many mistakes that result in devastating effects.
Moreover, to get the most of your website, there are several things that you need to consider. In this post, we mentioned some of the big mistakes that webmasters make, as a user you should take care of those mistakes and avoid making them in your site.
Emily White is a senior web developer at
CSSChopper, which is the most trusted web design and development company that provides solutions across the world. Emily loves coding and passionate about WordPress development. She likes to build the best WordPress solutions for clients. Besides web development, she also likes to write quality content for her audience providing detailed information and knowledge about various trends and technologies in the web design and development.


